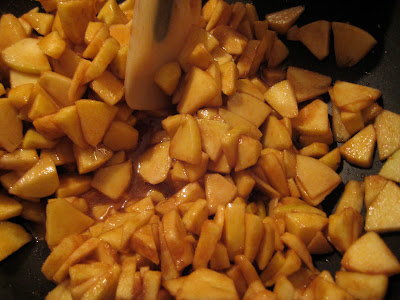
I hope everyone had a wonderful Thanksgiving! This year was exciting for me because I helped my mom bake the pies. Every Thanksgiving, she makes two apple and two pumpkin pies - my mom's apple pie being one of my all-time favorite desserts.
Making pies from scratch has always intimidated me really because of the crust. It seems like it would be difficult to nail the right texture, that buttery flakiness that's firm enough to hold together, while making it look aesthetically pleasing. Yet baking with my mom taught me that with a little patience and practice, it's actually quite doable and more than worth the effort.
My grandmother and The Joy of Cooking served as guides for my mom's crust, which has a dry, flaky texture she compares to that of a tart, with a dainty lattice over top. For the filling, she prefers firm, tart apples. This year she used stayman winesap apples from a local orchard; but when those aren't available she opts for Granny Smith. While having a seasoned teacher show you the nuances and tricks of pie-making is certainly the best way to learn, you can find many how-to videos and step-by-step instructions online that serve as excellent guides. Her recipe is below.
Mom's Apple Pie
Makes: 1 pie
- Ingredients -
Crust
- 2 cups all-purpose unbleached flour, plus additional for coating your work surface
- 1 tsp salt
- 10 tbsp unsalted butter, chilled
- 2 tbsp vegetable oil
- 5-6 tbsp water
Filling
- 3-4 cups apples, peeled, cored, and chopped into thin 1/2-inch long cubes
- 1/2 cup sugar
- 1/2 cup brown sugar
- 1/8 cup unbleached, all-purpose flour
- 1/4 cup lemon juice, (or the juice from 1/2 lemon)
- 1 tbsp cinnamon – Vietnamese if you can get it
- Tools -
- large cutting board
- pastry cutter
- rolling pin
- cutting wheel
- 9-inch pie pan
- plastic wrap
- scissors or knife
- large mixing bowl
- Instructions -
- Preheat oven to 425 degrees. Butter the pie pan and set aside. Flour your cutting board or work surface. Mix the flour and salt together in a bowl and transfer to your work surface.
- Cut the butter into the flour using a pastry cutter or by pinching it together with your fingers.
- Measure in the oil and gently work it into the flour mixture using your hands. In general, try to handle the dough as little and gently as possible; overworking will make it tough.
- Add the water and continue to work the flour with your hands. The flour mixture should be moist enough to start forming the dough into a ball. If it isn't, add more water, one tablespoon at a time, working after each addition until it forms the right consistency. The dough should not be overly moist or sticky.
- Form the dough into a mound and press down gently to flatten the top. Wrap in plastic wrap and let rest for at least 30 minutes or overnight, in the refrigerator.
- Dust your work surface with flour; remove and unwrap the dough. Flatten the dough slightly with your hands and dust lightly with flour before rolling the dough out with a rolling pin.
- Start rolling the dough from the center and work outwards using gentle, even strokes. You should try to retain a circular shape. Roll until the dough is approximately ¼-inch thick or thinner.
- Run a large knife covered in flour under the dough to ensure it doesn't stick to the work surface.
- With your buttered pie pan nearby, very carefully fold the dough in half. Carefully pick it up and place it into the pie pan.
- Unfold the dough, coaxing it with your fingertips to settle to the bottom and edges of the pan. Use a scissors or knife to trim to trim the overhanging dough to about a 1/4-inch overhang. Save the scraps for the lattice top.
- For the filling, toss the apples with the sugar, flour, and lemon juice in a large bowl. Pour the filling over the dough in the prepared pie pan.
- To make the lattice, lightly flour your work surface and form the scraps into a mound. Gently press down on the top to flatten, and roll the dough with your rolling pin to form a flat rectangle, about a 1/4-inch thick or less.
- With the pastry cutter, cut 6 long, thin strips approximately 1/2-inch wide.
- When you're ready to weave, moisten the rim of the pie with a small amount of water. Lay the first strip in an L in the center of the pie. Alternate horizontal and vertical strips, weaving them in an over-and-under pattern. Press the ends of the strips firmly to the lip of the pie and trim away any excess dough with the scissors or knife
- My mom creates a scalloped edge on her crust by pressing her right thumb into the dough towards her body and pinching both sides of the dough around her thumb with her pointer finger and thumb of her left hand. (If you're interested, Fish Food has some beautiful ideas for decorative pie crusts.
- Bake for 15 minutes at 425 degrees. Lower the heat to 350 and bake for an additional 40 minutes or until the apples are bubbling.


2 comments:
you really paid attention!!!
Looks delicious! The apples you sent home with us were very sweet and crisp, we really enjoyed them!
Jean
Post a Comment